
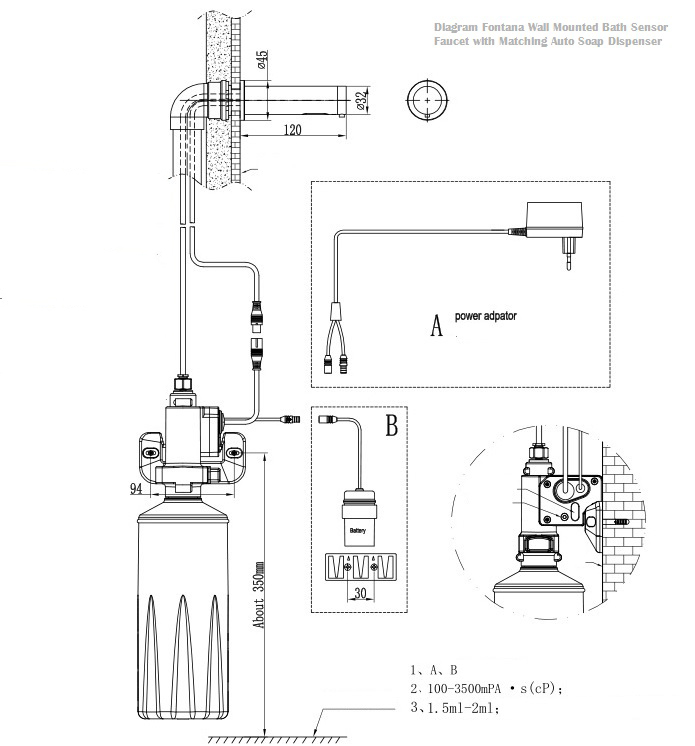
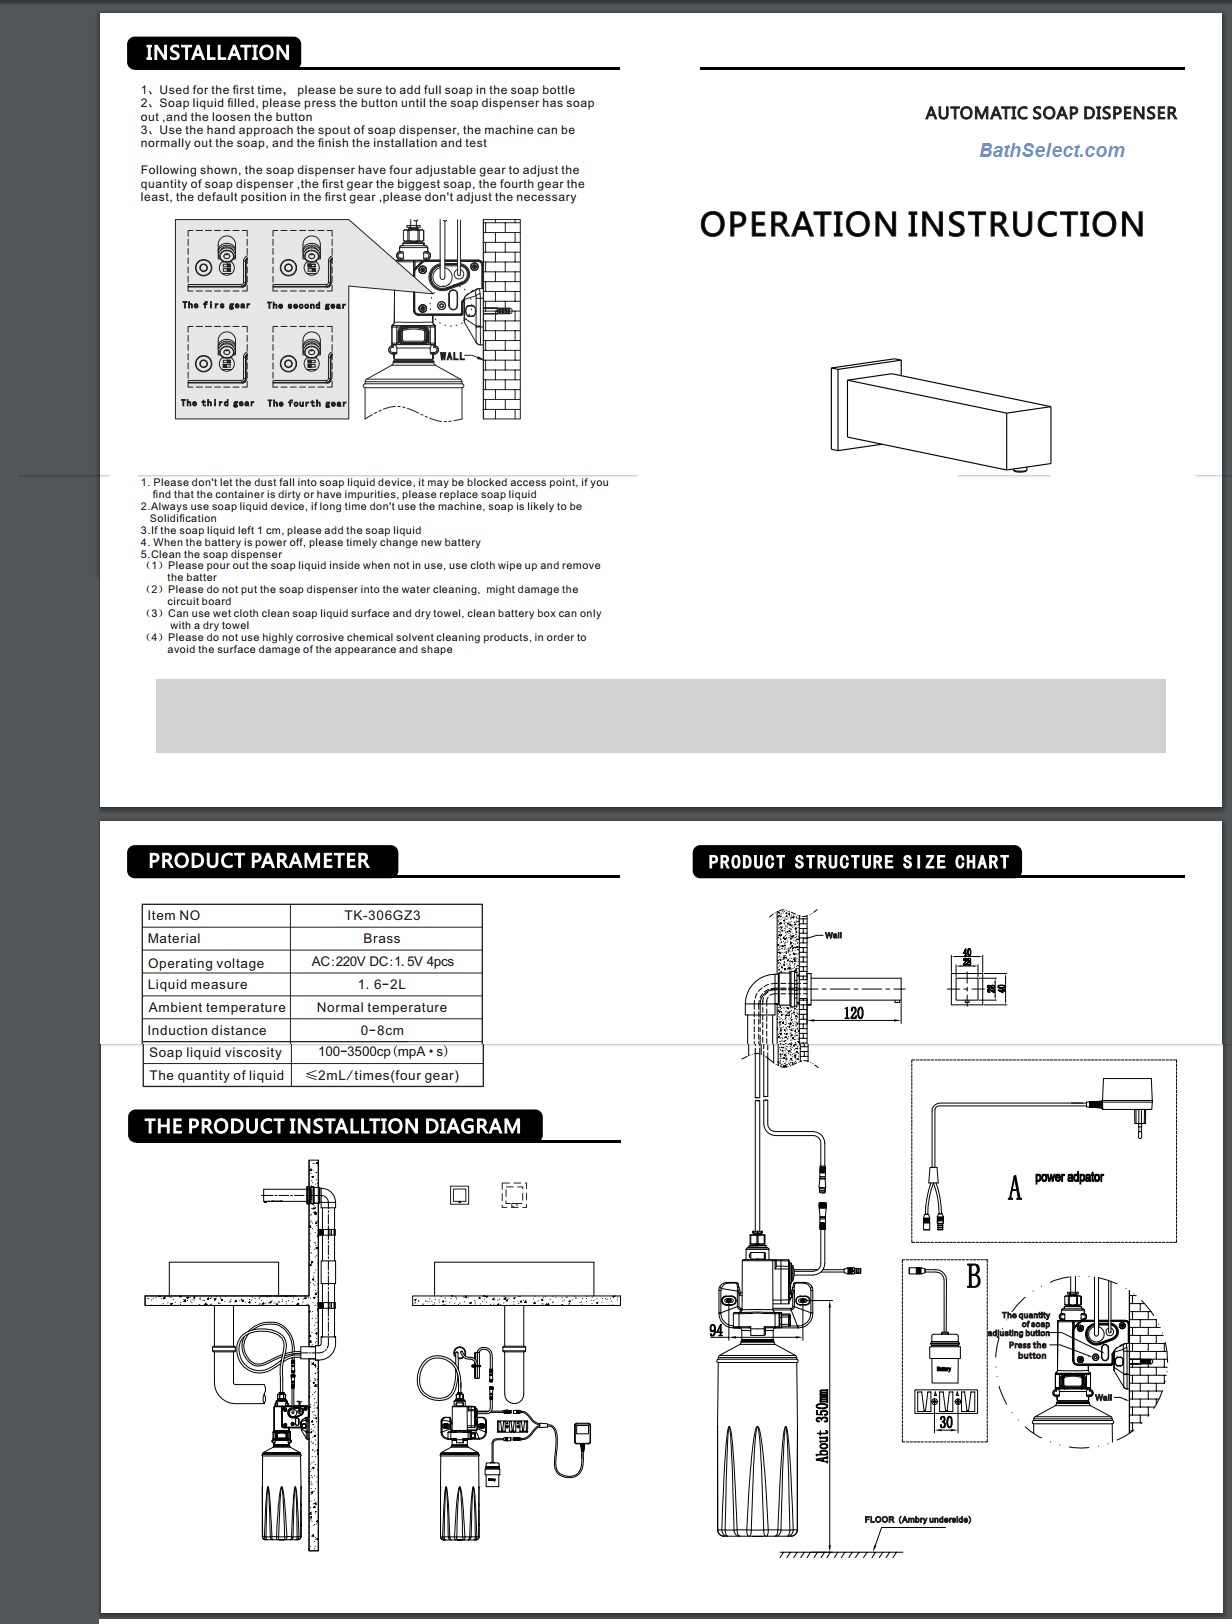
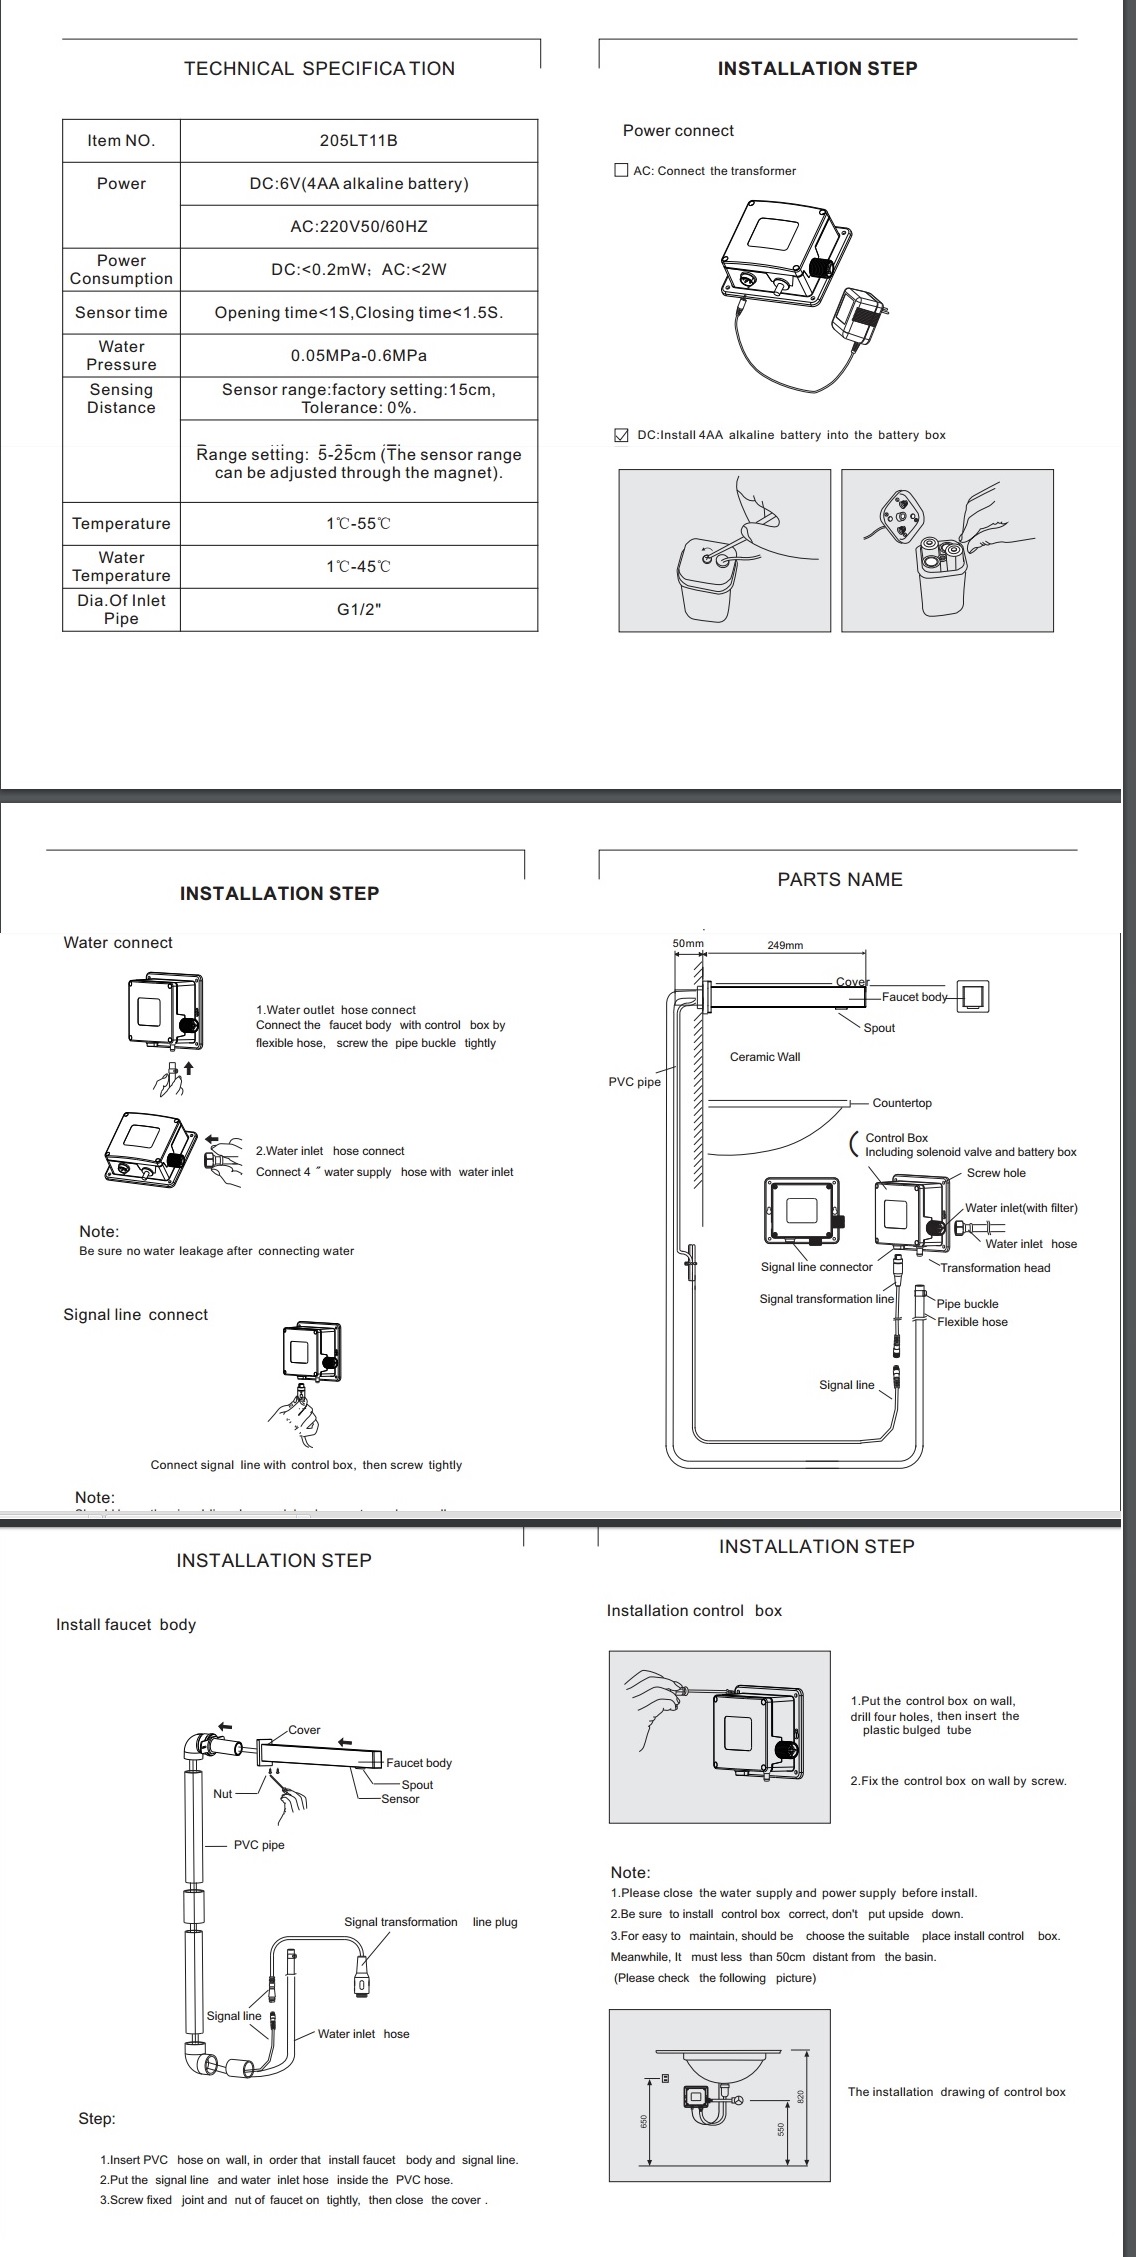
Tags: adjust the settings to the desired water temperature, adjusting the sensor settings if necessary to suit your needs, and ensure they align with the faucet’s mounting requirements, and functions efficiently, and sealant if needed, and sensor functionality, and specific installation steps for this particular model, as Fontana’s wall-mounted sensor faucets may require either batteries or an AC power source, as these will provide important details on the faucet components, attach the faucet to the mounting bracket once the bracket is securely in place, be prepared for any residual water in the pipes and keep a bucket or towel handy, before beginning, check for any pre-existing holes in the wall, check the faucet for alignment, check the power options and follow the manufacturer’s instructions to connect the power source properly, connect the power supply to the faucet, connect the water supply lines to the faucet’s inlet connections, ensuring it is level and aligned properly to prevent any instability, ensuring it is straight and positioned correctly on the wall, ensuring the sensor delivers water at the correct temperature when activated, finally, finished look and prevent water from seeping behind the faucet, first, follow the mounting instructions provided by Fontana, following these installation instructions will ensure that the Fontana Wall Mounted Bath Sensor Faucet is installed properly, for installation, for wall-mounted faucets, gather all necessary tools, hands-free experience that enhances both the aesthetic and functionality of your bathroom., having the correct tools will make the installation process smoother, if the faucet includes temperature controls or mixing valves, if the faucet is equipped with aerators or water-saving features, if you are replacing an existing faucet, locate the water shutoff valves and turn them off to avoid water flow while working, make sure that the connections are secure and that there are no drips from the water supply lines, make sure there are no fluctuations in water pressure or temperature once the faucet is functioning, make sure these connections are tight and secure using plumber’s tape to prevent leaks, make sure to check the depth of the water supply lines to ensure they are long enough to reach the faucet connection points, once everything is securely connected, overall, pipe wrench, plumber’s tape, prepare the wall and installation area by cleaning the surface where the faucet will be mounted, providing a hygienic, remove the old faucet carefully by unscrewing the mounting nuts and disconnecting any hoses, screwdrivers, seal around the faucet base with caulk or sealant if required by the manufacturer to create a clean, securely, several key steps need to be followed to ensure proper installation, shut off the water supply to the bathroom before starting, start by reading the manufacturer’s instructions thoroughly, such as an adjustable wrench, test the faucet’s sensor by waving your hand in front of it to ensure it responds properly, test the water flow to ensure it is consistent and the sensor activation is smooth, test them as well to ensure the water flow is optimized, this ensures that the faucet sits securely and prevents any leaks from occurring, tightening the screws to ensure the faucet is firm, tools required, turn on the water supply and check for leaks, typically, water flow, When installing the Fontana Wall Mounted Bath Sensor Faucet, you’ll need to secure the mounting bracket to the wall using screws